 Pin It
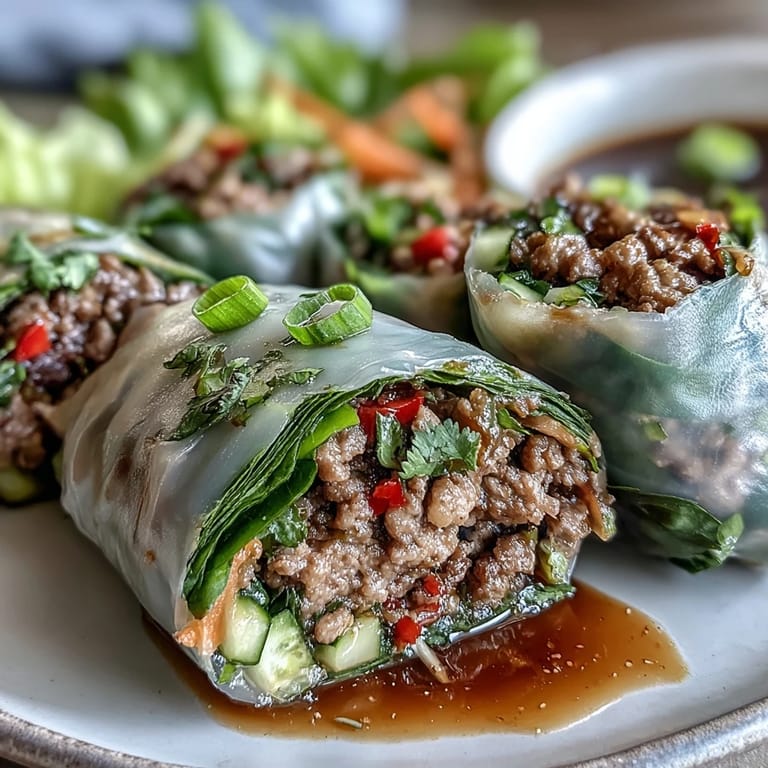
 The first time I made these rolls, my kitchen smelled like a street corner in Bangkok—the kind of place where motorbikes buzz past and woks hiss with garlic and chilies. I'd spent weeks hunting down the perfect balance for that beef filling, testing batch after batch until the sauce clung to the meat like a glossy coat of flavor. Now they're my go-to when friends come over, because watching someone bite into crisp vegetables wrapped around that savory, aromatic beef is pure joy. Plus, assembling them together turns cooking into conversation, which is really what food should be about anyway.
Last summer, I made these for a picnic and forgot napkins, which meant we were all licking sticky, tangy sauce off our fingers and laughing about it. Someone asked for the recipe before they'd even finished their first roll. Thats the kind of dish this is.
Ingredients
- Ground beef: The fat content here matters—85-90% lean keeps the beef juicy without making the rolls greasy, and it absorbs all those aromatic flavors beautifully
- Thai basil: Unlike Italian basil, this variety has a distinct peppery, anise-like kick that cuts through rich beef, and wilts perfectly into hot meat
- Fish sauce: Dont skip this—its the salt that brings depth, not just saltiness, and it creates that authentic Thai flavor foundation
- Rice paper wrappers: They transform from brittle circles into pliable sheets with just a quick dip in warm water, then soften further as you work
- Lime juice: Added at the very end to brighten the cooked beef, this prevents the filling from feeling too heavy
Tired of Takeout? 🥡
Get 10 meals you can make faster than delivery arrives. Seriously.
One email. No spam. Unsubscribe anytime.
Instructions
- Make the sauce seasoning first:
- Whisk together the soy sauce, fish sauce, oyster sauce, dark soy sauce, and sugar until dissolved completely, then add just enough water to create a glossy, pourable consistency
- Cook the aromatics:
- Heat oil in a large skillet or wok over medium-high heat, then add garlic and shallot, stir-frying for 30-45 seconds until fragrant and just beginning to color
- Add the heat:
- Toss in minced chilies and the white parts of the green onions, cooking 20-30 seconds until their sharp scent blooms in the air
- Brown the beef:
- Add the ground beef, crumbling it with your spatula and cooking 4-6 minutes until mostly browned with some caramelized spots developing
- Soften the peppers:
- Stir in diced red bell pepper and let it cook 2-3 minutes until just softened, still with a little bite for texture contrast
- Coat with sauce:
- Pour the sauce seasoning over the beef, tossing to coat everything evenly, then cook 2-3 minutes more until the sauce reduces and clings to the meat
- Finish with herbs:
- Reduce heat to low, add chopped Thai basil and green onion tops, tossing just until the basil wilts (about 30-45 seconds), then stir in lime juice
- Cool completely:
- Spread the beef mixture on a plate or baking sheet to speed cooling to room temperature—warm filling makes rice paper soggy and tears easily
- Prep your rolling station:
- Set out bowls with cooled rice or noodles, shredded lettuce, julienned cucumber and carrots, and plenty of fresh herbs, then fill a shallow dish with warm water
- Whisk together the dipping sauce:
- Combine fish sauce, lime juice, sugar, and water in a small bowl, stirring until sugar dissolves, then add garlic, chilies, carrot, and herbs to taste
- Soften the rice paper:
- Dip a wrapper in warm water for 3-5 seconds, rotating to moisten all sides, then place on a lightly oiled board or plate where it will continue to soften
- Layer your fillings:
- Place rice or noodles on the bottom third, then add beef, cucumber, carrot, lettuce, and a generous handful of herbs, keeping everything in a compact rectangle
- Roll it up:
- Fold the bottom edge over the filling, fold in the sides like a burrito, then roll tightly away from you to create a neat cylinder
- Serve or store:
- Cut rolls diagonally to reveal the beautiful layers inside, or leave whole—these are best fresh but will hold for a few hours wrapped in damp towels
 Pin It
 These rolls have become my answer to What can I bring thats impressive but not too heavy. They disappear faster than anything else I make.
Making Ahead Like A Pro
The beef filling actually develops deeper flavor after a night in the fridge, so I often cook it the day before and store it in an airtight container. You can also prep all the vegetables and herbs, keeping them separate in containers lined with damp paper towels. Just wait to assemble the rolls within a few hours of serving—they'll get soggy if left too long, and nobody wants a sad, limp rice paper moment.
Mastering The Rice Paper
Learning to work with rice paper took me a few attempts, and I tore more wrappers than I care to admit. The secret is soaking it just enough to become pliable but not so much that it turns fragile and sticky. If you're new to this, have a few extra wrappers on hand for practice, and remember that slightly under-soaked is better than over-soaked. The paper continues softening as you work with it, so trust the process.
Building Your Perfect Roll
I've learned that how you layer the fillings changes everything about the eating experience. Put softer ingredients like rice and herbs closer to the wrapper, with crisp vegetables toward the center. This keeps the roll structurally sound and gives you that satisfying crunch in every bite. Don't overstuff—its tempting to pack everything in, but a slightly underfilled roll holds together better and is easier to eat.
- Keep your work surface lightly oiled if rice paper sticks
- Roll firmly but gently, like you're tucking someone into bed
- Practice with the first couple wrappers—theyll be your learning ones
 Pin It
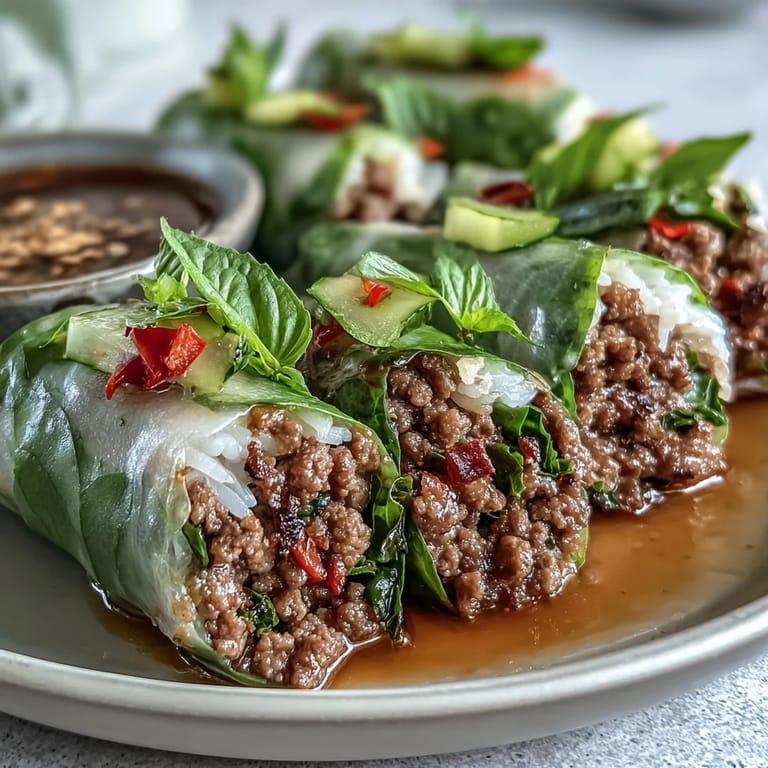
 There's something satisfying about hand-rolling food, maybe because it forces you to slow down and pay attention. These rolls are worth every minute of that time.
Recipe FAQs
- → Can I prepare the beef filling ahead of time?
Yes, cook and cool the beef mixture completely, then store in an airtight container in the refrigerator for up to 2 days. Bring to room temperature before rolling to prevent the rice paper from becoming soggy.
- → What's the best way to prevent rice paper from tearing?
Use warm—not hot—water and dip wrappers for just 3-5 seconds. They'll continue softening as you work. Handle gently and place fillings on the bottom third, leaving enough room to fold without overstuffing.
- → Can I make these gluten-free?
Absolutely. Use tamari or gluten-free soy sauce, check that your oyster sauce is certified gluten-free, and verify rice paper brands are GF. The remaining ingredients are naturally gluten-free.
- → How long do rolled rolls stay fresh?
Best enjoyed immediately or within 2-3 hours when covered with a damp towel and plastic wrap. Refrigeration can make rice paper tough. If storing longer, keep components separate and assemble just before serving.
- → What can I substitute for Thai basil?
Italian basil combined with mint makes a decent substitute, though the anise-like notes will differ. Holy basil or sweet basil work in a pinch. For closest flavor, check Asian markets or grow your own Thai basil.
- → Can I use a different protein?
Ground turkey, chicken, or pork work well with the same seasoning. For a vegetarian version, use crumbled tofu or tempeh, extending the stir-fry time slightly to develop flavor and texture.