 Pin It
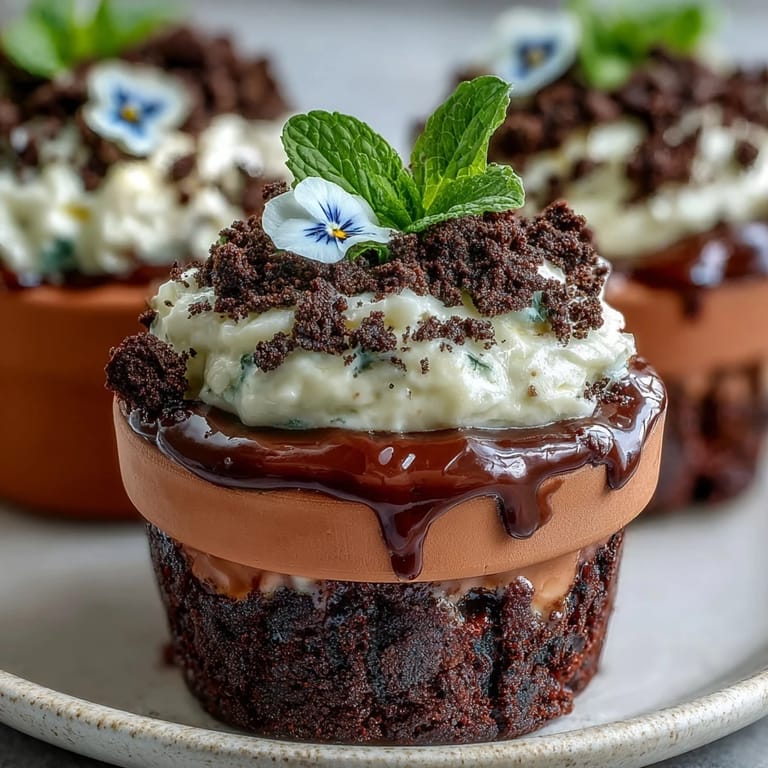
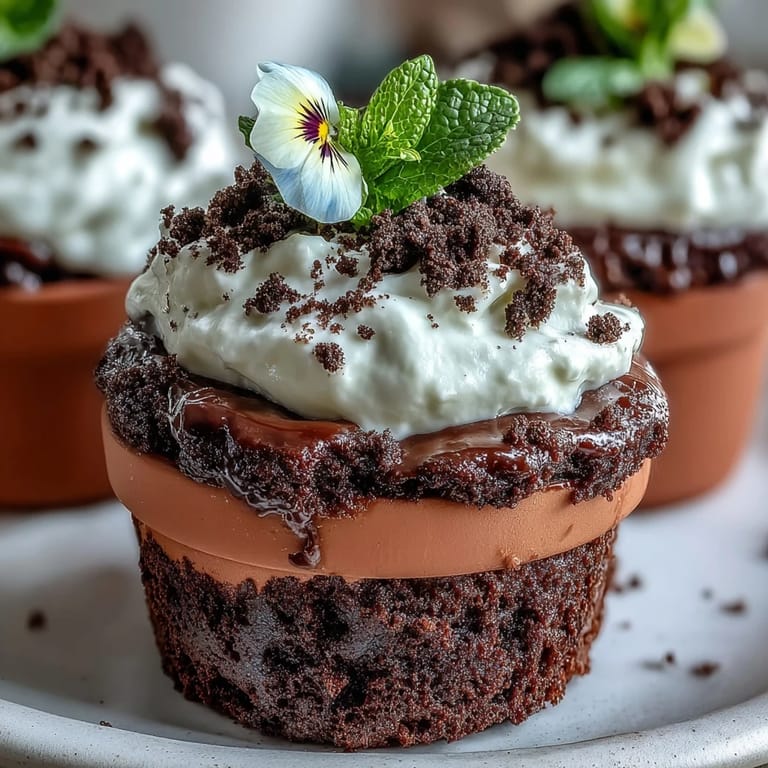
 Some desserts make me grin just thinking about assembling them, and these Mother's Day Flower Pot Brownies are among those joyful treats. I still remember the scent of warm chocolate filling the kitchen while I lined up my little flower pots on the counter, each one waiting to become a miniature garden. Watching the swirl of whipped cream puff up and crushed Oreos crumble into soft, edible "dirt" felt almost like indulging in childhood playtime rather than baking. There's just something wonderful about transforming everyday brownies into a blossoming surprise. It always brings a bit of whimsy to a special table, especially when celebrating someone as important as Mom.
Last spring, I made these with my niece, who insisted we use every color of edible pansy we could find at the market. We covered the countertop in sprigs of mint, flower petals, and gummy candies, the two of us giggling as we debated the best arrangement for mom's "garden." The brownies became more than dessert—each pot held a personal touch and a memory made together. Even my brother, who 'never eats sweets,' was caught sneaking bites out of one as we brought them to the table. These little pots sparked friendly debate over who had the prettiest—and tastiest—mini garden.
Ingredients
- Unsalted butter: Melting it gently gives the brownies their signature fudgy texture—a little patience is worth it.
- Granulated sugar: I’ve learned that beating it smoothly into the warm butter ensures the tops get that shiny crackle.
- Large eggs: Letting them come to room temperature helps the batter blend smoothly—cold eggs can make things lumpy.
- All-purpose flour: Only a touch is needed—overmixing can lead to dryness, so I always stir until just combined.
- Unsweetened cocoa powder: Use a good quality cocoa for deeper chocolate flavor; it makes a surprising difference.
- Baking powder: Just enough lift to keep brownies soft but not cakey.
- Salt: Never skip it; salt balances out all the sweetness.
- Vanilla extract: Fresh vanilla takes the whole mix from ordinary to rich and fragrant.
- Oreo cookies: Crushing them—cream and all—means the "soil" tastes luxuriously chocolaty and glossy.
- Heavy cream: Whipping until stiff gives a cloud-like layer that holds up under the Oreo crumbs.
- Powdered sugar: A little sugar keeps the cream sweet but not overwhelming—taste as you go.
- Edible flowers or colorful gummies: These are for decoration, but also spark the most joy—pick vibrant, food-safe blooms or candies.
- Fresh mint leaves (optional): They add a burst of green and cool aroma that transform the presentation.
Tired of Takeout? 🥡
Get 10 meals you can make faster than delivery arrives. Seriously.
One email. No spam. Unsubscribe anytime.
Instructions
- Get the pots ready:
- Preheat your oven to 175℃ (350℉). Line the bottoms of oven-safe mini flower pots with parchment or prepare a baking tray if improvising—either way, there's something satisfying about imagining brownies baking in little terra cotta homes.
- Melt and blend:
- Gently melt butter in a saucepan until just liquid, then remove from heat. Whisk in the sugar and vanilla while it's still warm—watch for the sugar dissolving like magic.
- Add the eggs:
- Crack in eggs one at a time, whisking until the mixture feels glossy and smooth under your spoon. You’ll notice the batter deepen in color and shine.
- Mix dry ingredients:
- Sift together flour, cocoa, baking powder, and salt—sifting makes all the difference in avoiding lumps in these brownies.
- Combine everything:
- Fold the dry mix gently into the wet ingredients just until no streaks remain. Resist the urge to overmix; a few swirls is all it takes.
- Fill the pots and bake:
- Spoon batter evenly into 6 clean, oven-safe mini pots (about 200ml each), or spread it in a lined baking tray if you’re planning to cut after. Bake for 20–25 minutes: the moment a toothpick comes out with moist crumbs, you’re there—don’t overbake.
- Cool completely:
- Set aside to cool—this is always the hardest part because the kitchen smells so chocolatey—but patience keeps the cream from melting later.
- Create Oreo dirt:
- Crush whole Oreos into fine crumbs using a food processor or gently smash in a resealable bag. There’s a certain joy in the tactile crunch of this step.
- Whip the cream:
- Beat heavy cream with powdered sugar to stiff peaks—it will look cloud-like and luscious. Watch carefully, as overbeating turns it grainy.
- Build the flower pots:
- If you used a baking tray, cut brownies to fit the bottoms of each pot. For pots already baked, move right along to the next step.
- Layer and decorate:
- Cover each brownie with a layer of whipped cream, then dust generously with Oreo crumbs until it looks like rich garden soil. Now, the fun: nestle edible flowers, gummies, and mint leaves to create your "blooming" scene.
- Chill and serve:
- Let the finished pots chill in the fridge until ready to present—they hold up beautifully and are ready when the celebration begins.
 Pin It
  Pin It
 The first time I served these at brunch, the table fell silent except for the sound of spoons cracking through the "soil." It felt unexpectedly heartwarming to see everyone lean in for a closer peek at their edible gardens before digging in together—validation that sometimes the cutest ideas also taste amazing.
Making the Flower Pot Magic
There’s something delightfully tactile about packing brownie, cloud-like whipped cream, and cookies together in a little pot. I’ve found it helps to press everything gently so the layers hold their shape but still look a bit rumpled and playful—perfect isn’t the point, after all. Let everyone decorate their own, and you’ll get six different mini masterpieces on the table. Don’t worry if the flowers tip over or the "dirt" is uneven—the charm is in the homemade feel. I once had a gummy worm escape mid-photo and it became the hit of the dessert table.
Ingredient Swap Secrets
If time is tight or you’re cooking with kids, don’t hesitate to use a boxed brownie mix—it does the trick and lets you focus on the fun part: layering and decorating. Once, I mixed chopped nuts into the batter, which added a fantastic crunch that made people ask for the "secret ingredient." Swapping in golden Oreos or chocolate chips opens this recipe up to new themes or allergies for everyone at the table. Even playing with the cream—add a spoonful of mascarpone for extra richness—can take things in a sophisticated direction. A little kitchen improvisation seems to fit the playful spirit of this recipe perfectly.
Decorating to Delight (and Tips to Nail It)
I like to set all my edible decorations out on a tray, so everyone can design their own garden. If you use real flowers, double-check they’re safe to eat, and rinse them well before using. Never underestimate how much a few mint leaves or bright gummies can make the whole dessert pop. Letting the kids decorate almost always leads to hilarious results and excitement.
- Don't over-whip the cream or it will turn grainy quickly.
- Chill the flower pots before filling for an extra cool, refreshing bite.
- Gently press down the Oreo layer so it stays put when serving.
 Pin It
  Pin It
 May your Mother's Day be filled with laughter, brownies, and the sweet fun of making tiny gardens together. These pots are a memory as much as a dessert—enjoy every bite and every moment assembling them.
Recipe FAQs
- → Can I bake the brownies in a pan instead of mini pots?
Yes. Bake in a lined pan, let cool completely, then cut rounds or squares to fit each pot. This ensures even baking and makes handling easier for non-oven-safe containers.
- → How do I make the Oreo crumb 'soil' fine and even?
Pulse whole cookies in a food processor until you reach a fine, sandy texture. For a coarser look, pulse less. If using a rolling pin, place cookies in a sealed bag and crush evenly for consistent crumbs.
- → What keeps the whipped cream stable during assembly?
Chill the bowl and beaters before whipping. Add powdered sugar and whip to stiff peaks. For longer hold, fold in a small amount of stabilizer like gelatin or mascarpone, or use chilled heavy cream straight from the fridge.
- → Are the edible flowers safe to use?
Only use flowers labeled food-safe from reputable sources. Violets, pansies and certain nasturtiums are common choices. Wash gently and pat dry before placing on top to avoid excess moisture.
- → How far ahead can I assemble the pots?
Assemble up to a few hours ahead and keep chilled. Add delicate flowers just before serving to maintain color and texture. If transporting, store upright and chilled to prevent shifting.
- → Any suggestions for flavor variations?
Fold in chocolate chips or chopped nuts to the batter, swap Oreos for chocolate wafer crumbs, or scent whipped cream with a touch of vanilla or citrus zest for brightness.