 Pin It
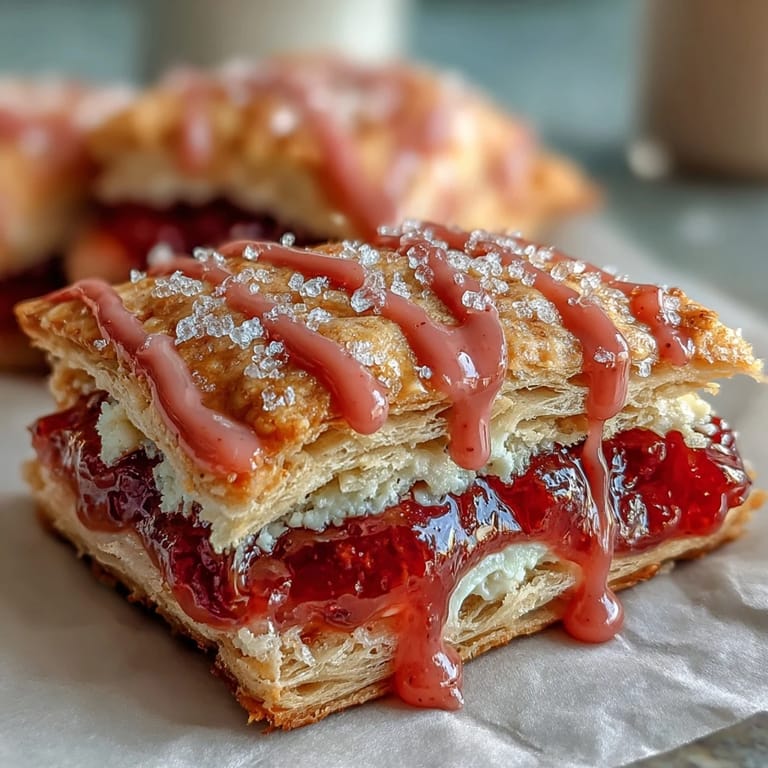
 My neighbor Maria brought these to a potluck last summer, and I watched them disappear faster than anything else on the dessert table. When she told me they were homemade pop tarts filled with guava and cream cheese, I thought she was joking—until I bit into one and tasted that perfect balance of tart jam, creamy filling, and buttery pastry. I pestered her for the recipe for months before she finally relented, and now I understand why she kept it close. These aren't just a nostalgic breakfast treat; they're something entirely their own.
I made these for the first time on a rainy Tuesday morning, thinking I'd impress my roommate before she left for work. The kitchen filled with this warm, buttery smell about twenty minutes into baking, and she came downstairs asking what was happening. Watching her face when she bit into one—that slightly confused look followed by the smile—told me everything I needed to know. She took three to go and asked me to make them again the next week.
Ingredients
- All-purpose flour: The foundation of everything; make sure it's fresh because old flour can make your pastry dense instead of flaky.
- Unsalted butter, cold and cubed: Cold butter is everything here—it creates those tiny pockets that bake into flakiness, so resist the urge to use room temperature butter.
- Ice-cold water: This keeps the dough tender, so chill your water in the fridge before mixing if your kitchen is warm.
- Guava paste or thick guava jam: The sweet-tart star of the show; guava paste has a deeper flavor than jam, but use whichever appeals to you more.
- Cream cheese, softened: A few minutes on the counter is all it needs, and soft cream cheese mixes into the guava without lumps.
- Powdered sugar: Don't skip sifting it for the filling and glaze; lumps will ruin the smooth texture you're aiming for.
- Egg wash: One beaten egg seals the pastry and gives that beautiful golden color, so don't skip brushing.
Tired of Takeout? 🥡
Get 10 meals you can make faster than delivery arrives. Seriously.
One email. No spam. Unsubscribe anytime.
Instructions
- Build your pastry base:
- Whisk flour, sugar, and salt together, then add your cold cubed butter and use a pastry blender or your fingertips to work it into coarse crumbs—this looks like damp sand. The small butter pieces are what make these pop tarts shatter in your mouth later.
- Bring the dough together:
- Drizzle in ice-cold water just until the dough holds together without being wet, then divide it in half, flatten each into a disk, wrap in plastic, and let them chill for 30 minutes. This resting time lets the gluten relax so your pastry stays tender.
- Mix the filling:
- Blend softened cream cheese with powdered sugar and vanilla until perfectly smooth—no lumps allowed, because you want this to feel creamy against the tart jam.
- Cut and fill:
- Roll out one dough disk thin (about 1/8 inch), cut into 8 rectangles roughly 3 by 4 inches, then place a teaspoon of guava paste and a teaspoon of cream cheese mixture in the center of half your rectangles. Leave a little border so nothing squeezes out.
- Seal everything shut:
- Brush the edges of your filled rectangles with beaten egg, top each with a plain rectangle, press the edges firmly, and crimp with a fork for a classic pop tart look. These crimped edges are both decorative and functional—they hold everything together during baking.
- A quick chill before baking:
- Pop them onto a parchment-lined baking sheet and refrigerate for 10 minutes while your oven preheats to 375°F. This brief chill prevents the pastry from spreading too much in the oven.
- Brush and vent:
- Brush the top of each pop tart with more egg wash for shine, then prick a few times with a fork so steam can escape and the pastry stays crispy. This prevents them from puffing up unevenly.
- Bake until golden:
- Bake for 22 to 25 minutes until they're a deep golden brown—don't rush this step because the pastry needs time to set and crisp. Let them cool completely on the baking sheet before moving on to the glaze.
- Make the glaze:
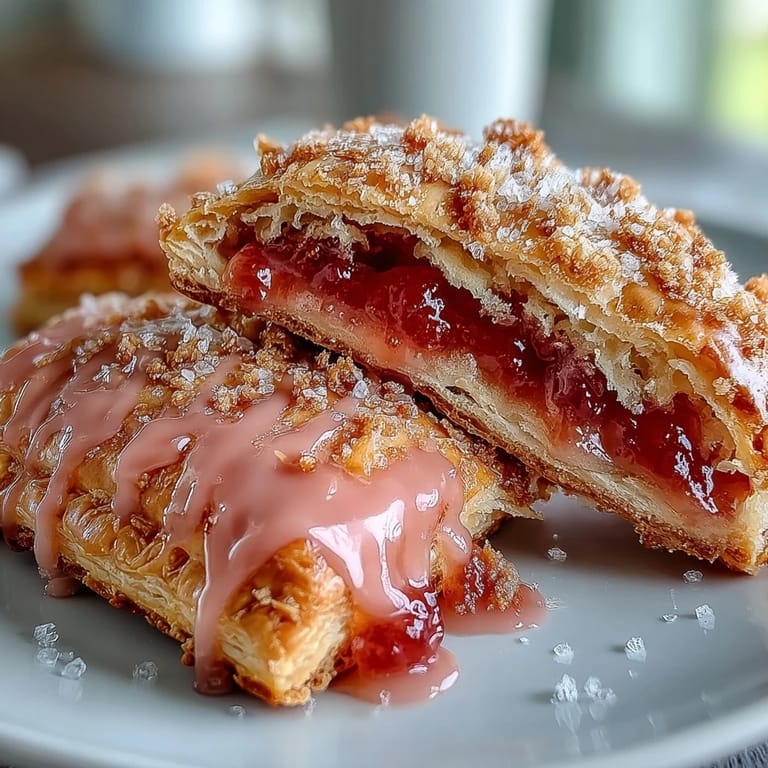
- Whisk powdered sugar with milk and vanilla until smooth and pourable, then add a drop of pink or red food coloring if you like—this adds that pop tart nostalgia. Drizzle or spread it over the cooled pastries and let it set before eating.
 Pin It
 The moment I realized these were something special came when I brought them to my daughter's soccer practice and the other parents actually asked for the recipe instead of just taking a bite. There's something about homemade pop tarts that makes people feel like you've done something impressive, even though the truth is the recipe does most of the work. Now she requests them for breakfast on game days, swearing they taste better than the store version.
Why Homemade Pastry Changes Everything
Store-bought pop tarts are convenient, sure, but there's no comparison to biting through a pastry you've made yourself. Homemade pastry has layers and air pockets that commercial versions can't match because they're made in massive batches with stability in mind. When you make pastry by hand, you're controlling the butter-to-flour ratio and the moisture level, which means you get genuine flakiness instead of that slightly waxy texture. Plus, your kitchen smells incredible for hours afterward.
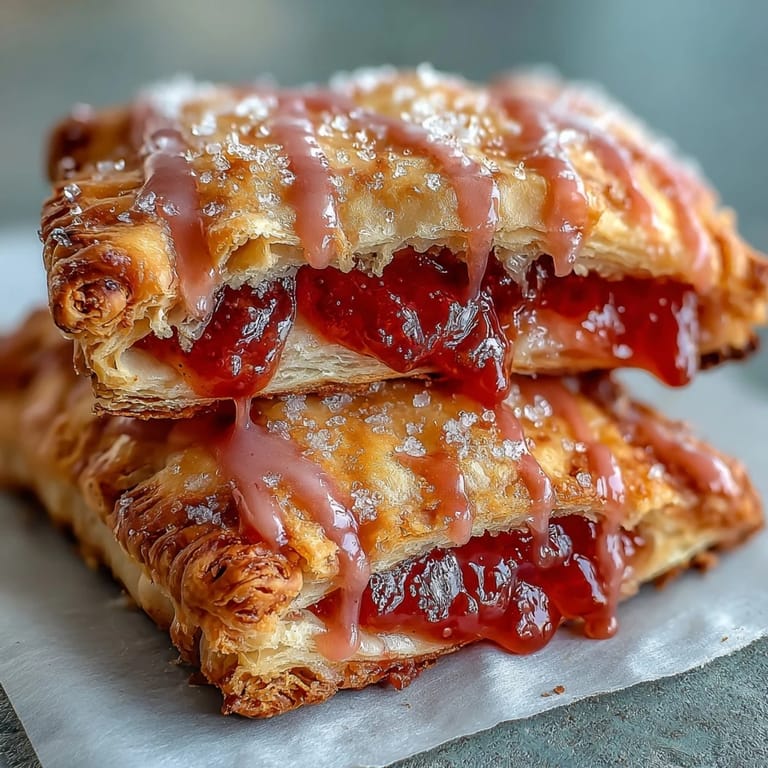
The Guava and Cream Cheese Partnership
Guava is naturally tart and tropical, while cream cheese brings richness and subtle tang—they're a duo that sounds unusual until you taste them together. The cream cheese tempers the intensity of the guava just enough so it's not overwhelming, and the guava keeps the cream cheese from feeling too heavy. I learned this combination by accident when I was trying to use up leftover cream cheese one afternoon, and now I can't imagine these tarts without both. It's one of those flavor combinations that feels like it's always been obvious once you discover it.
Storage and Make-Ahead Tips
These pop tarts actually taste better the day after you make them because the flavors have time to settle and blend. You can bake them up to three days ahead and store them in an airtight container at room temperature, which makes them perfect for meal prep or unexpected guests. The glaze will stay glossy if you keep them sealed away from air, and there's something nice about having something homemade ready whenever you want it.
- If you're in a rush, you can make the dough and filling up to two days ahead and assemble them fresh on baking day.
- Freeze unbaked pop tarts on a baking sheet for up to a month, then bake straight from frozen—just add a few extra minutes to the baking time.
- Reheat cooled pop tarts in a 300°F oven for five minutes if you want them warm, or eat them straight from the container for a different texture.
 Pin It
 These pop tarts have become my answer to "what can I bring" because they're impressive without being complicated. Once you make them once, you'll find yourself making them again and again, tweaking here and there until they're exactly how you like them.
Recipe FAQs
- → Can I make the dough ahead of time?
Yes, prepare the dough up to 2 days in advance. Wrap each disk tightly in plastic and refrigerate. Let soften slightly at room temperature before rolling.
- → What can I use instead of guava paste?
Strawberry, apricot, or raspberry jam work beautifully. Thicker preserves hold better during baking. Adjust sugar if using sweeter alternatives.
- → How do I prevent the filling from leaking?
Keep guava portions small (about 1 teaspoon), seal edges firmly with fork tines, and chill filled pastries 10 minutes before baking. This sets the butter and helps seals hold.
- → Can I freeze these pop tarts?
Absolutely. Freeze unbaked tarts on a tray, then transfer to bags. Bake from frozen, adding 3-4 minutes. Baked ones freeze well too—reheat in a 350°F oven for 8 minutes.
- → Why prick the tops before baking?
Venting allows steam to escape, preventing air pockets from forming inside. This keeps the pastry flat and ensures even baking throughout.
- → How long does the glaze take to set?
Allow 15-20 minutes at room temperature. For faster setting, refrigerate briefly. Avoid stacking until completely dry to prevent smudging.